Software
Blender 2.93
Adobe Photoshop 2021
HandBrake 1.3.3
1.1 Concept
1.2 Research
During this phase of the project I mainly focused on character and environment research. My main inspiration for the former came from fictional characters such as the T1000 from the Terminator 2 movie and the Silver Surfer from the Marvel comic book series.(1.2.1) I aimed for a minimalistic theme a robotic mannequin with no facial features and a metallic texture.
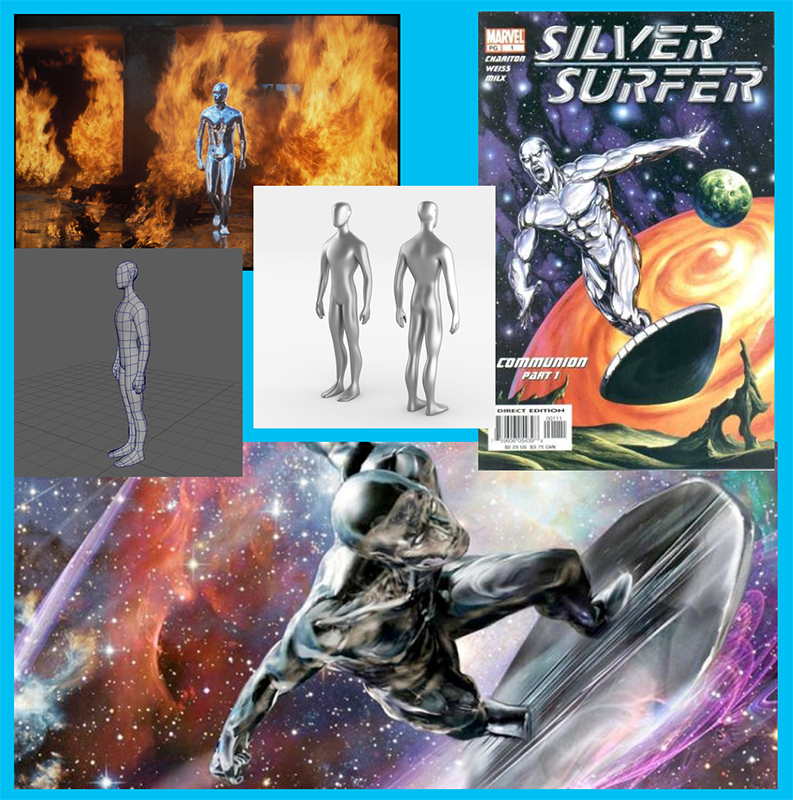
1.2.1
When creating the 3D scene I wanted to capture a sci-fi/industrial design theme a bright, clean and airy space. My intention with the grand environment and distance was to invoke a sense of difficulty when aiming without our product. I was inspired by high-tech warehouses, hangars and space stations.(1.2.2)
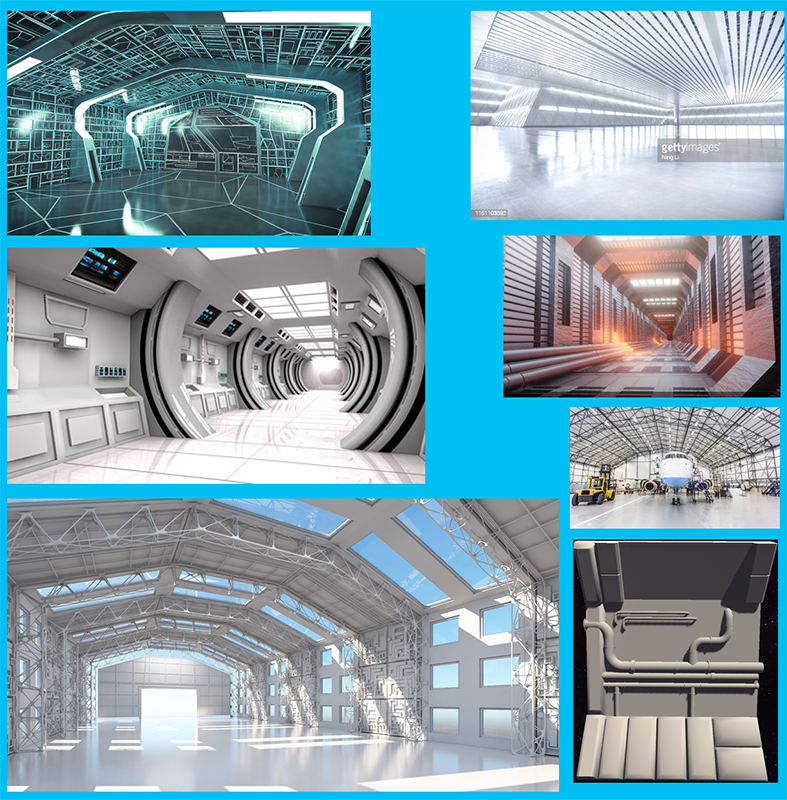
1.2.2
1.3 Structuring
1.4 Modelling the Character
1.5 Modelling the Hangar
1.6 Modelling the Beam Structure
The final part of modelling was all about mistakes and learning from them. Due to impending deadlines I needed an immediate solutions for modelling the desired main feature the beam system for the hangar. Unfortunately I copied the vertices from an existing roof element in order to produce the same size and outline not realising that there were numerous duplicate verts. I added a large number of segments and applied various modifiers such as shade smooth, array, solidify, bevelling started to generate seemingly random extruding vertices and unnecessary loopcuts.(1.6.1) Only by starting over the modelling I managed to overcome the issues.
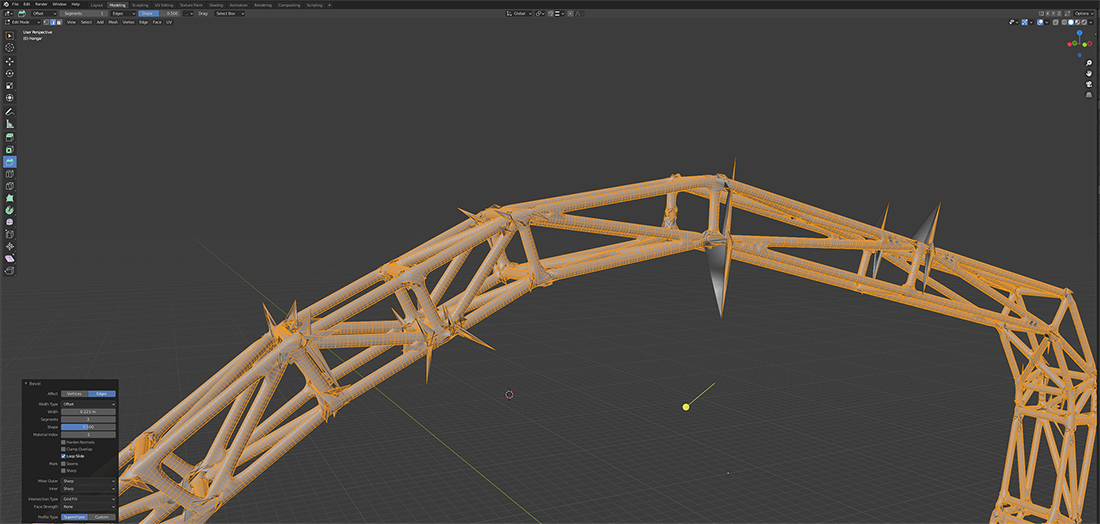
1.6.1
1.7 Texturing
1.8 Rendering
1.9 Animating Objects
Animation was a brand new discipline for me and without prior knowledge I managed to grasp the basics in a short amount of time. I created a nurbs path by pressing Shift+A adding a path within the curve dropdown. Next step was to make the arrow follow this route.(1.9.1) This was achieved by adding the follow path relationship from the object constraint properties setting the nurbs path as a target. I refined the movement smoother by adjusting the offset.
1.9.1
2.0 Camera Animation
Similarly to the arrow animation the camera was following an assigned nurbs path. Circling around the archer and travelling parallel but somewhat ahead of the arrow.(2.0.3) Then also from the object constraint panel a damped track was added and the arrow set as target.(2.0.2) I also changed the track axis to -Z ensuring that the camera was facing toward the arrow while following it's own track. (2.0.1) Again some adjustments to both camera and arrow offsets were necessary in favor of continuous and lag free tracking.
2.1 Lighting
According to my early plans I wanted to construct a bright space inside the hangar with god-rays illuminating dust particles. I intended to achive this with natural ligh shining through skylights, and huge windows. I made several variants of the hangar roof and walls.(2.1.1) Since the particle system was not part of the final work I added more windows to the roof and entirely removed the back wall.
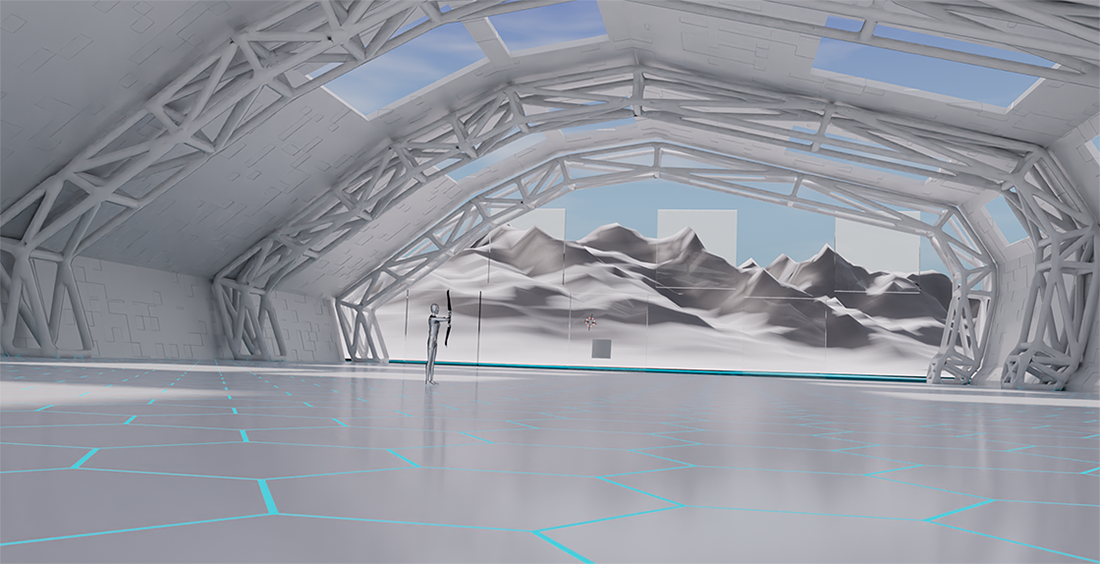
2.1.1
2.2 Conclusion
Although character and camera animation may not have been in the focus of my interest credit to the Mobile Device Project, I gained some valuable experience in these principles. This endeavor since then became more than just a skill. I used and most likely will use animations on many future projects and presentations including my own website. Working with a great team such as this is something I missed through the other projects in year one. The ease of communication, friendly attitude and work ethic of the team was unparalleled. Despite my inexperience in rendering and the poor quality of the final video I was positively pleased with my models, composition, and arrangement.
2.3.1