Software
Blender 2.93
Adobe Photoshop 2021
1.1 Concept & Role
This was a second client group project I took part in the second semester of year 2. My part however was only to model the soap box based on Daniel Herbert's designs.
1.2 The Brief
To create an eco-friendly multi soap bar holder that is sealable leakproof all whilst keeping the bars separate and the brand. To many, the idea of having a soap bar may appear odd let alone having 5 that you use daily, but for the health and eco-conscience having 5+ bars is just a regular routine, a shampoo, conditioning, body wash, face wash, shaving and hand bars can eliminate single-use plastic bottles, having an oversized wash bag or sacrificing luxury and necessity for a mater of size and weight.
1.3 UN Sustainable Development Goals
The main reason I chose to partake in this project was its eco conscious nature. Sustainable solutions and design always fascinated me. Throughout the briefing our client's Sam's key words echoed my beliefs: reduced-carbon footprint, recycled, vegan, sustainable, eco-friendly. This resonates parallel to The United Nation Sustainable Development Goals.(1.3.1)
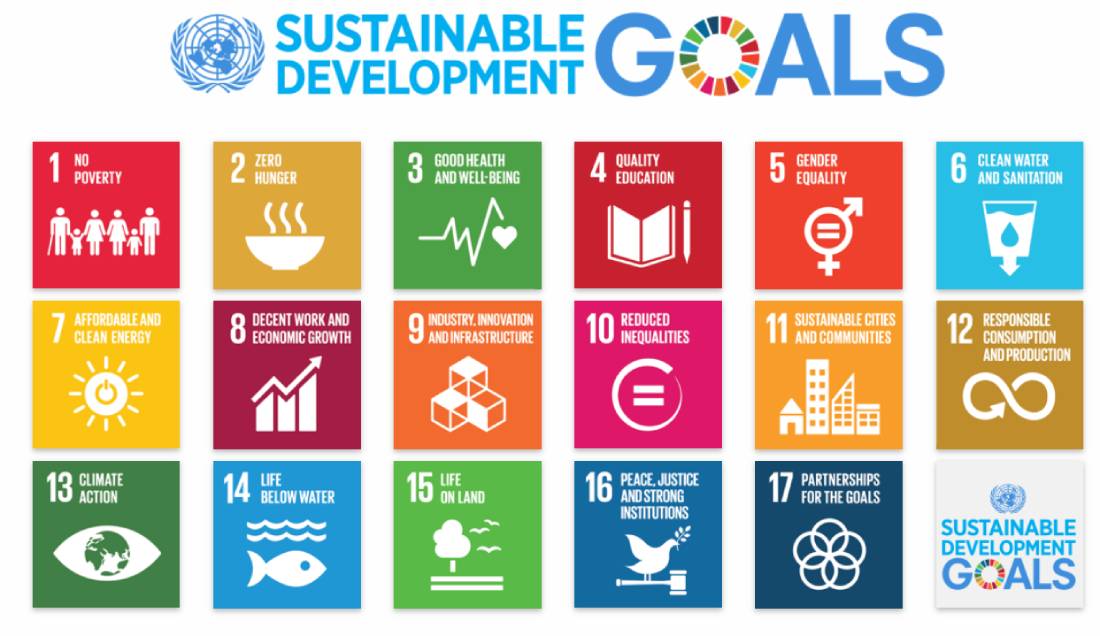
1.3.1
1.4 Research & Design Prerequisites
With the above mentioned in mind I began my research of eco-friendly brands, similar products then I concentrated on green materials and packaging. (1.4.1)

1.4.1
Early on we discussed the possibility of a bamboo material with Daniel. Bamboo became a synonym material for nature oriented marketing in recent years. One design requirement however prevented its implementation. Given the nature of the product it must stay waterproof and that is rather challenging to achieve within the scope of a small production line. Hence we sought the alternative solution of recycled plastics. (1.4.2, 1.4.3).
1.5 Design Adjustments
Daniel sent over his initial design drawing with measurements. I made a basic 3D prototype in Blender. We worked closely with Dan making small adjustments and improvements to appeal more to the clients growing brief.(1.5.1)
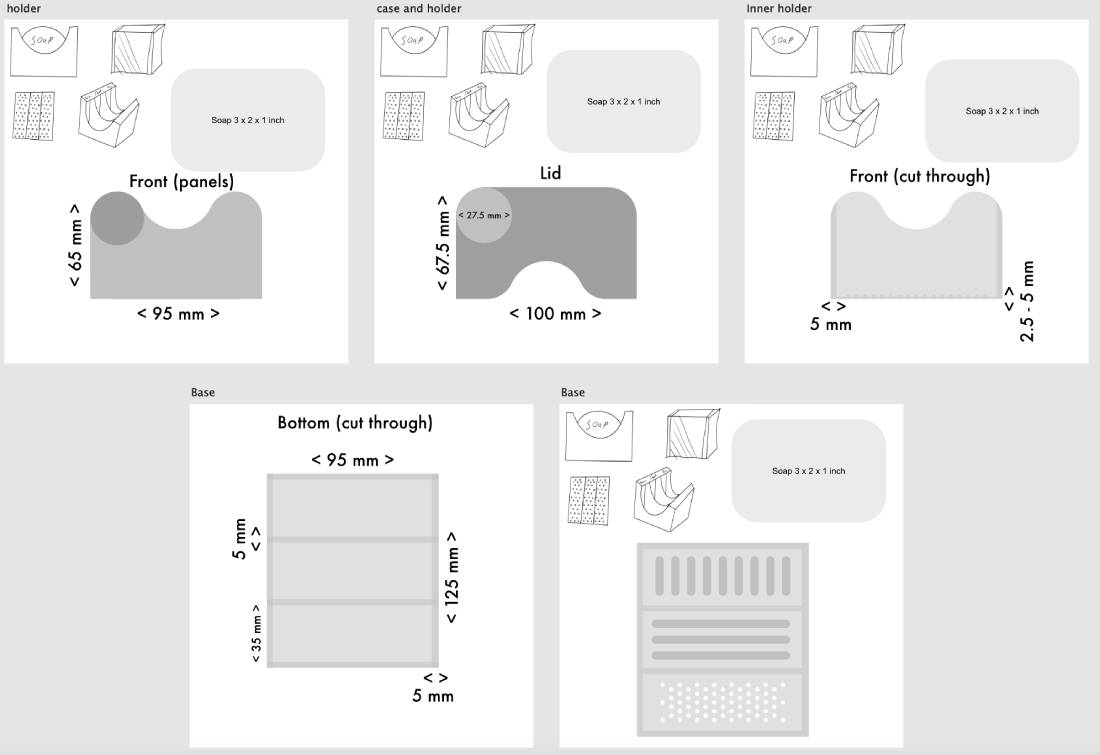
1.5.1
In order to adhere to the proper dimensions I enabled a free built-in Blender Add-on called MeasureIt. Whilst it showed exact measurement as shown on the image below changing dimensions were quite challenging in the two decimal scale. It may be my inexperience but I do not aware of any other measuring method within the programme (1.5.2)
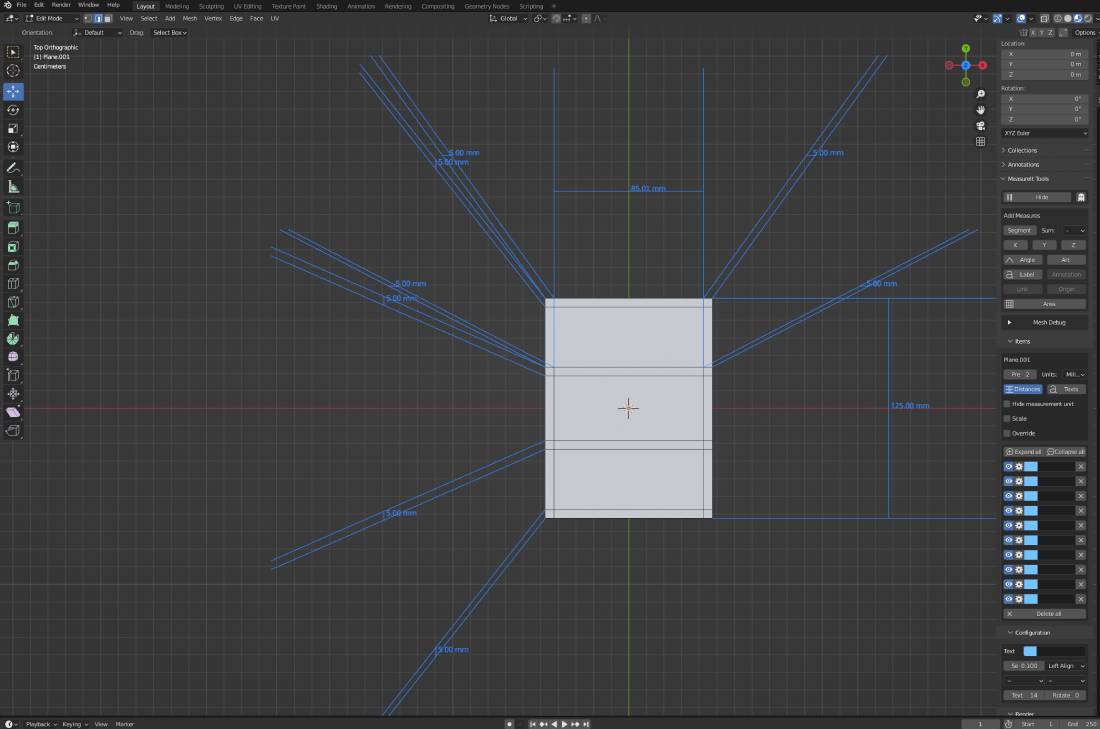
1.5.2
1.6 Topology
Although this model might seem easy to model still we had some back and forth messaging with Daniel. Both top and bottom part of the soap box appeared to show no issues neither in Blender nor in 3D Viewer however when the .fbx or .obj file was imported into Adobe After Effects topology issues were indicated by some extra faces as well as the bottom part's side panel had no width albeit the applied solidify modifier. (1.6.1)
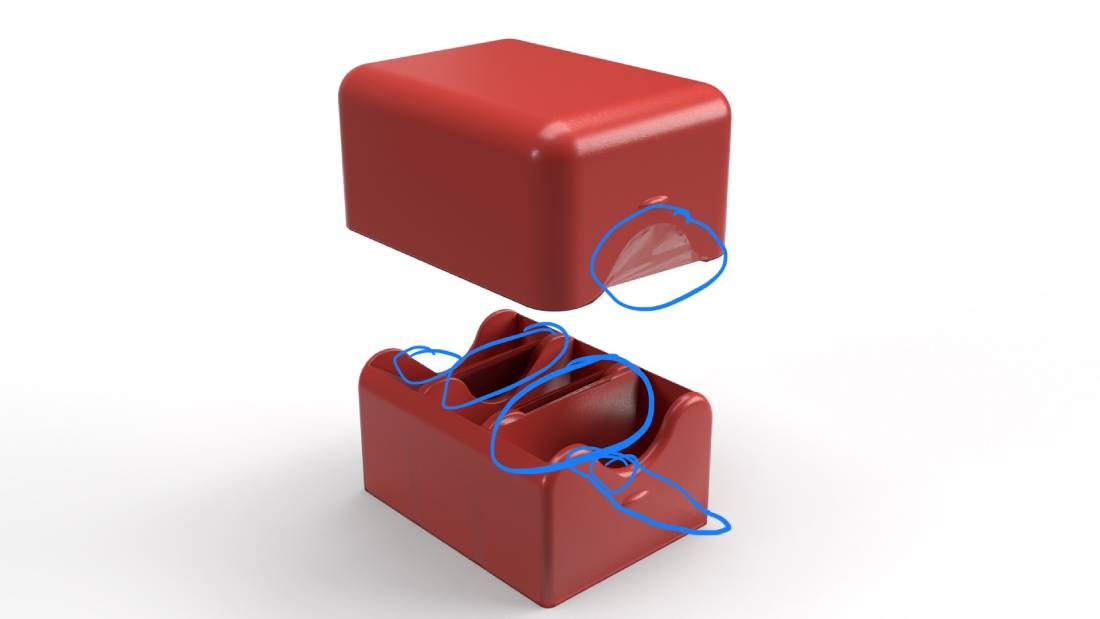
1.6.1
It took some time to find the solution. The inconvenience of not posessing an After Effects licence meant file transfer iterations with Daniel. The basic topology troubleshooting steps such as merging vertices by distance or at center did not rectify the problem. (1.6.2)

1.6.2
I consulted with colleagues who suggested triangulating faces might help. Originally I wanted to keep all faces quad based, nevertheless after remodelling the top piece once again and triangulating all faces it emerged without further issues. Yet the more complex bottom section still showed signs of topology errors despite all efforts. I found the answer by magnifying the topology to the maximum in wireframe view. When working with very small intricate surface areas such as bevelled corners of miniature faces Blender overlapped vertices forming extra unwanted geometry not visible in normal view. In the third remodelling attempt I added extra loopcuts as holding edges near the corner cleaned up the whole topology and triangulated all faces. Paying particular attention to the bevelled geometry the model was almost complete. (1.6.3)

1.6.3
1.7 Finishing Touches
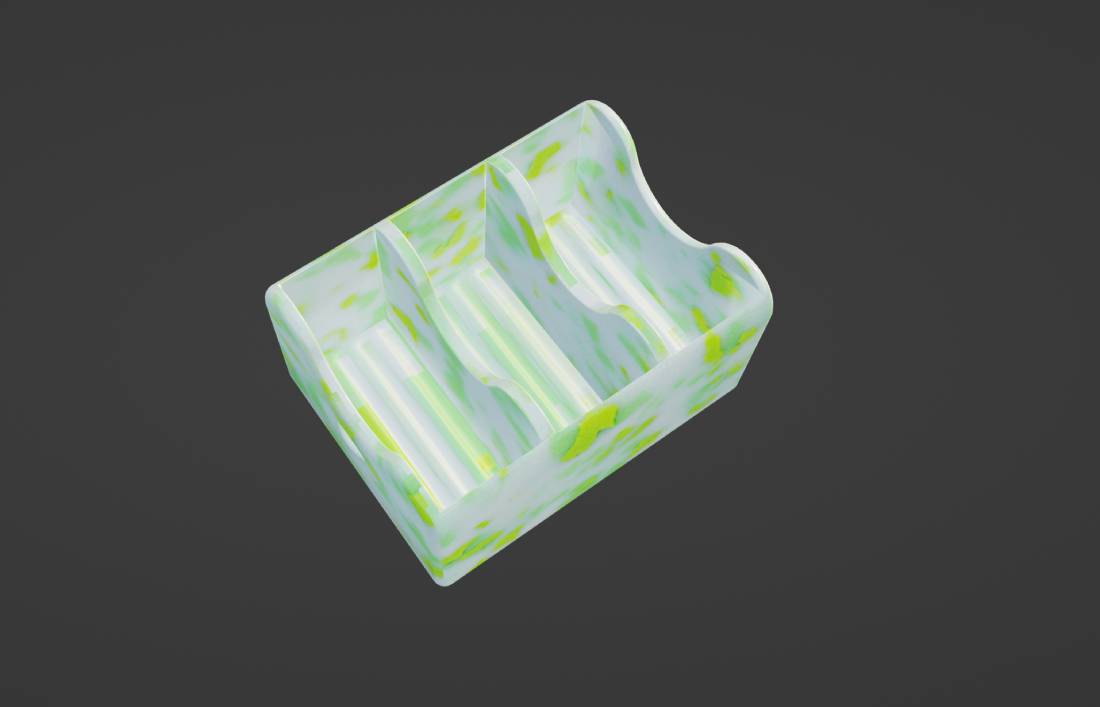
Once the modelling issues has been dealt with the holding in and out dentations were made. The bottom perforations were formed to hold the soaps out of excess water. In order to get a smoother surface I applied Shade Smoothing and Auto Smooth above 30 degrees to produce gentle curves. I UV mapped all faces and applied the materials as image textures. (1.7.1)
1.7.1
1.8 Conclusion
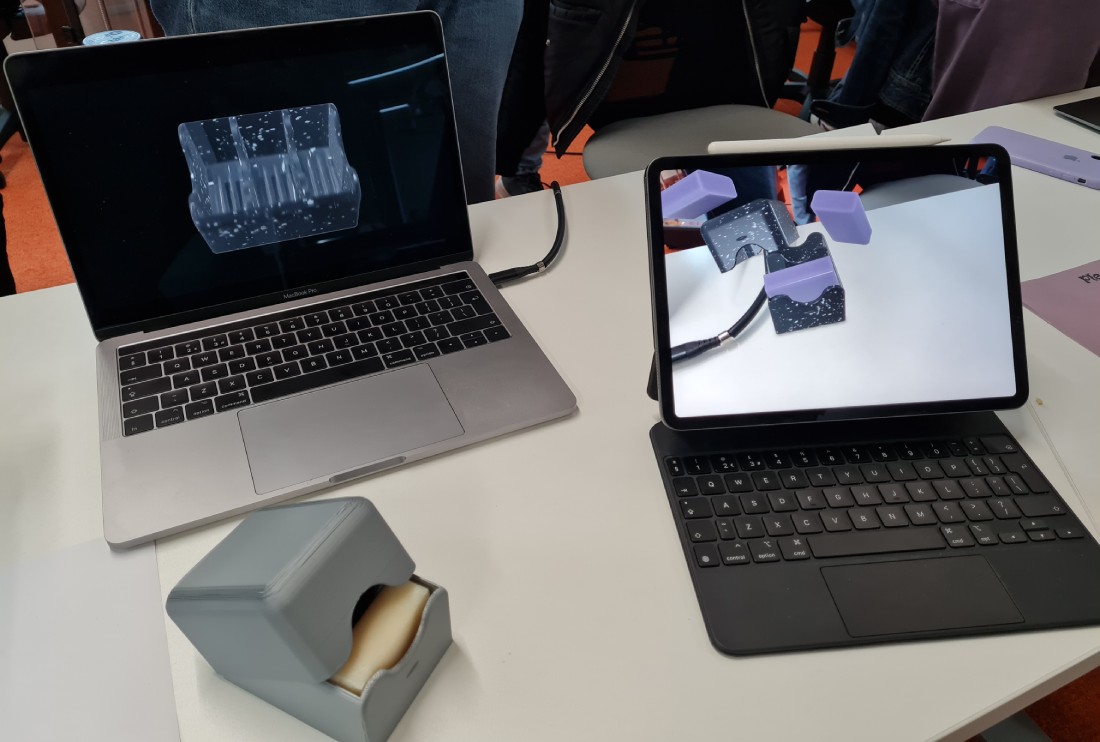
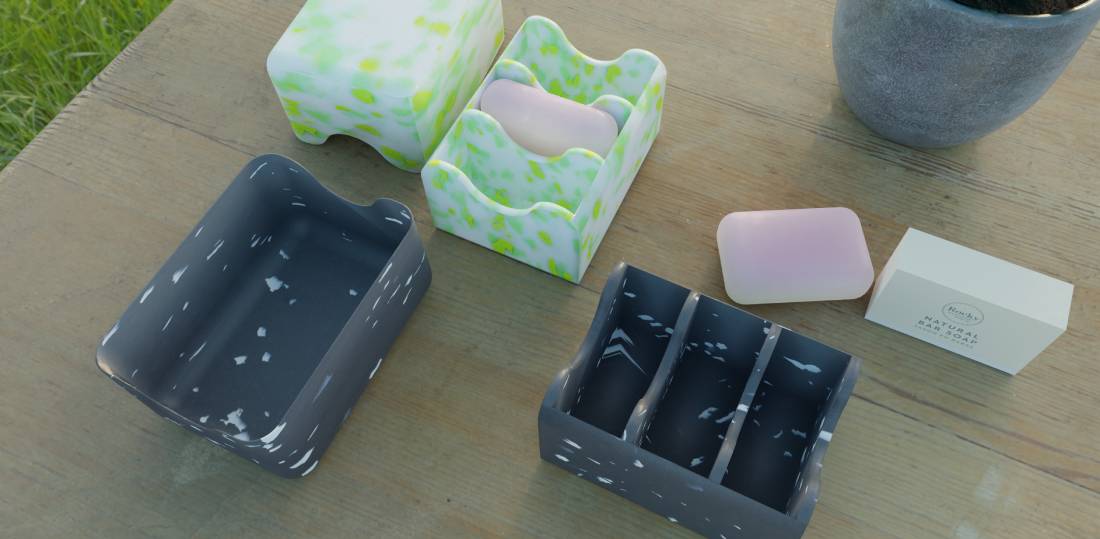
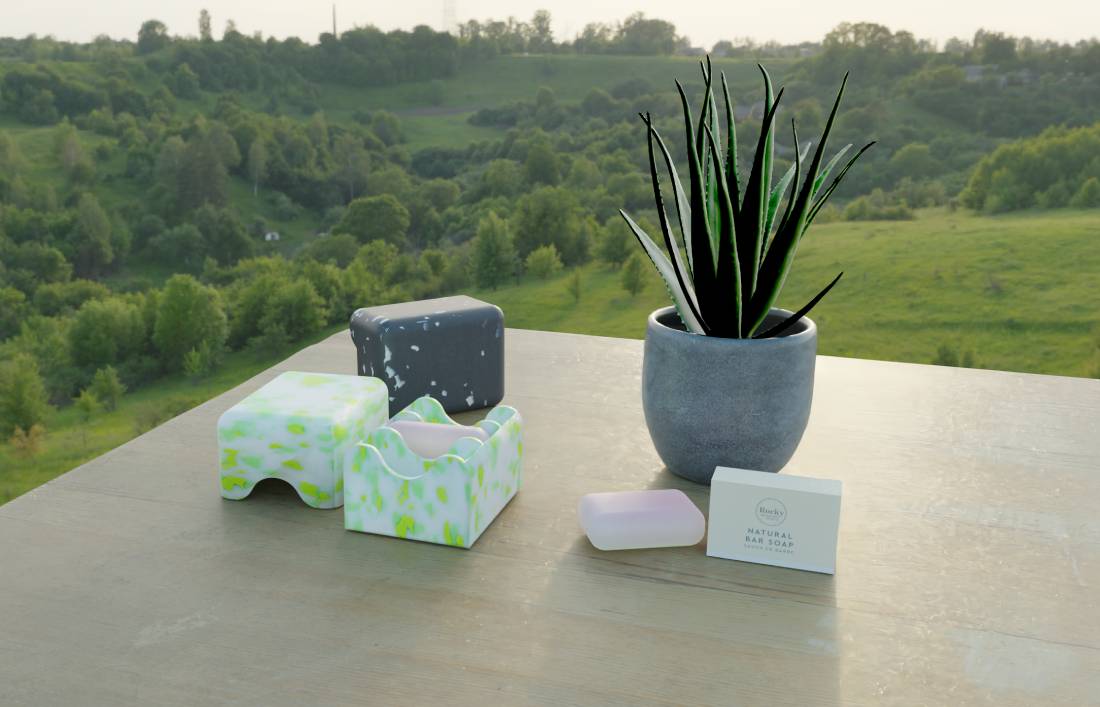
I learned a lot about advanced topology techniques on this assignment. Attention to detail is crucial especially when working with small surfaces. Allocating time for unforseen delays or issues is a must and should be part of all future project plans. The attached Gannt Chart shows the tasks span over a week. (1.8.1) Working with Daniel is always a pleasure and I hope to do so again in upcoming projects. I was delighted to see the 3D printed model of my making at the Transmedia 2022 exhibition. (1.8.2) I composed a basic scene and rendered in the built-in Cycles engine to create a realistic frame for client presentations. (1.8.3, 1.8.4)

1.8.1
1.8.2
1.8.3
1.8.4